


Your cabinets face daily stress from constant use, heavy loads, and moisture. Over time, hinges loosen, doors sag, and drawer slides wear out. But, you don't need to replace them when you know how to fix them.
Most homeowners deal with similar cabinet problems. Sticky doors, broken handles, and worn finishes are common but can be fixed. Professional cabinet repair can make them work like new again, saving you money.

This guide will show you how to identify and fix problems. You'll learn how to assess issues, choose the right tools, and follow step-by-step repair steps. These methods work for small fixes and big repairs.
Smart homeowners choose to repair their cabinets instead of renovating the whole kitchen. With the right techniques, your cabinets can last for decades. This guide will give you the skills and confidence for DIY repairs.
Assessing Your Kitchen Cabinet Problems
Before you start fixing your kitchen cabinets, it's key to check them thoroughly. This step helps you find all the problems and plan how to fix them. A good look will show you both the obvious and hidden issues that could get worse.
Identifying Common Cabinet Issues
Begin by checking your cabinets' doors, drawers, and hardware. Look for doors that sag or don't close right, and gaps between doors and frames. Also, check if hinges are loose or broken, if drawer slides are sticky, and if handles are worn out.
Look for scratches, dents, peeling veneer, or water stains on the surface. Structural problems might include loose corners, cracked wood, or issues with how they're mounted. Try opening each door and drawer to see if they work right and if they need door adjustment or new hardware.
Determining Repair vs. Replacement Needs
Decide if fixing your cabinets is cheaper than getting new ones. Think about how old they are, their quality, and how bad the damage is. Small problems like loose hinges or scratches can usually be fixed.
But, if there's a lot of water damage, structural issues, or if they're really out of style, it might be better to replace them. Compare the cost of repairs to buying new cabinets to make a smart choice.
Creating a Repair Priority List
Make a list of problems by how urgent and important they are. Fix safety issues first, like doors that don't close or hardware that's failing. Then, work on problems that affect how you use your cabinets every day.
Save cosmetic fixes like refinishing or adjusting doors for last. This way, you use your time and money wisely and don't forget important repairs. It helps you stay on track with your plans and budget.
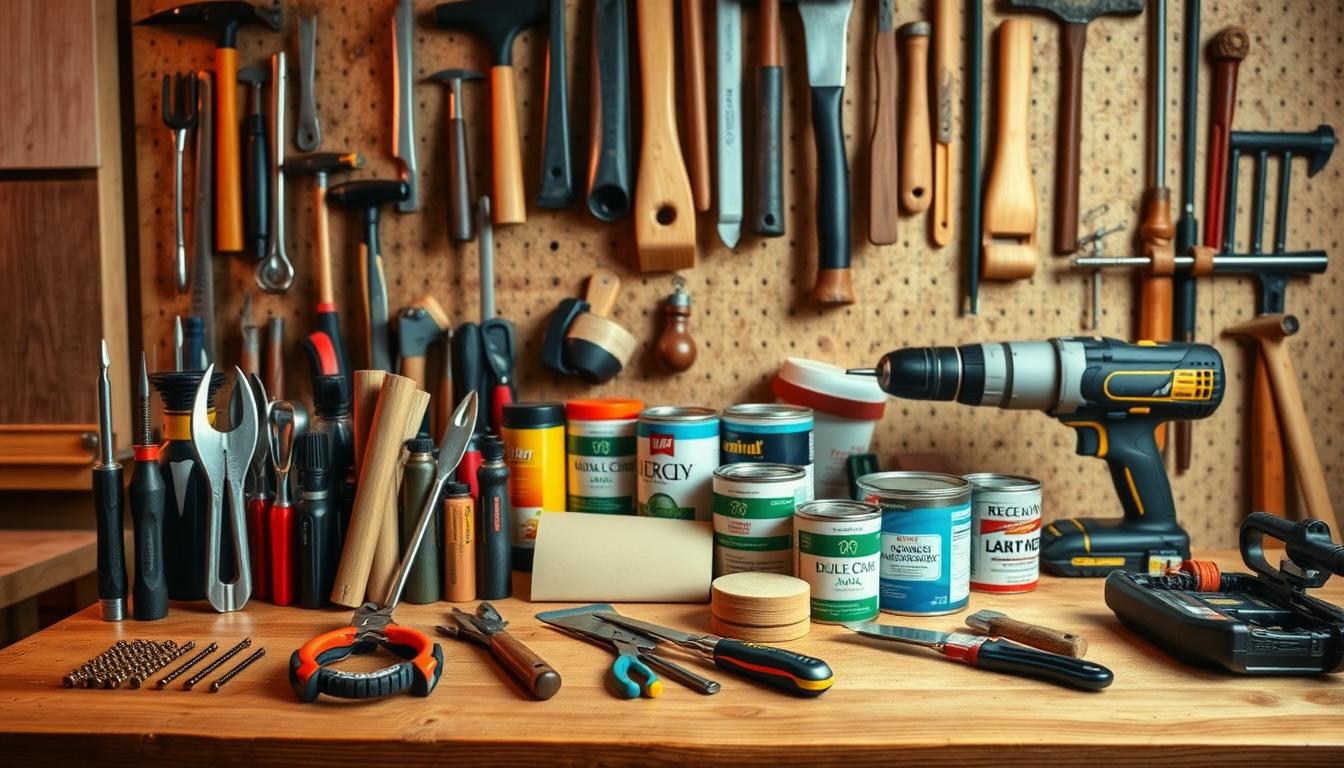
Essential Tools and Materials for Cabinet Repairs
Fixing cabinets needs special tools and materials for precise work. The right tools help avoid damage and make repairs quicker. They also ensure your work looks professional.
Basic Hand Tools Required
Every repair starts with basic hand tools. You'll need a screwdriver set for different screws. Drills with various bits are key for drilling holes and screws.
Measuring tools are crucial for accuracy. Use a tape measure, combination square, and level to keep things straight. Precision matters for smooth cabinet parts.
Specialized Cabinet Hardware and Fasteners
For lasting repairs, you need the right cabinet hardware. Hinges, drawer slides, and catches must fit perfectly. Getting the right measurements is key for door function.
Fasteners keep your cabinet stable. Wood screws, machine screws, and connectors are essential. Choose ones that match the original's strength and look.
Safety Equipment and Workspace Preparation
Wear safety gear to protect yourself from hazards. Safety glasses and dust masks are must-haves. They keep you safe from wood chips and dust.
A well-lit workspace and a stable workbench are vital. Good lighting and a solid workbench help you do better work. Keep your tools organized for easy access.
How to Fix Kitchen Cabinets with Loose or Broken Hinges
Fixing cabinet hinges starts with finding out why they failed. Most problems come from too much use, bad installation, or weak fasteners. The fix depends on the issue, like loose screws, damaged holes, or broken hardware.
Tightening Loose Hinge Screws
First, check all screws with a screwdriver to find the loose ones. Turn each screw clockwise firmly until it's snug. Don't over-tighten to avoid damaging the cabinet.
After tightening, test the door's movement. If screws keep coming loose, the holes might need fixing before you can fix them for good.
Repairing Stripped Screw Holes
For stripped holes, you need wood repair methods. Remove the screws and see how bad the damage is. For small damage, use wooden toothpicks with wood glue in the holes.
Let the glue dry for 24 hours, then cut off the excess. For big damage, drill out the bad area and fill it with wooden dowels and glue for strength.
Complete Hinge Replacement Process
When hinges are too worn or broken, you need to replace them. This step needs careful measurement and the right installation to make the door move smoothly.
Measuring for New Hinges
Measure the old hinge's size and the door's overlay. Note the hole pattern to match the new hinges.
Installation Techniques
Mark where to put the new screws with the hinge as a guide. Drill holes that are a bit smaller than the screws. Install one hinge at a time, checking the door's alignment each time.
| Repair Method | Time Required | Difficulty Level | Success Rate |
|---|---|---|---|
| Screw Tightening | 5-10 minutes | Easy | 85% |
| Hole Repair | 24-48 hours | Moderate | 90% |
| Complete Replacement | 30-60 minutes | Moderate | 95% |
Getting a pro to install ensures everything is right. Choose high-quality hinges for better performance and longer life.
Repairing Sagging and Misaligned Cabinet Doors
Door alignment issues in kitchen cabinets often develop gradually. They create noticeable gaps and operational difficulties. These problems affect both the visual appeal of your kitchen and the daily functionality of your storage spaces.
Without proper correction, misaligned doors can cause additional damage. This damage can worsen over time.
Successful cabinet maintenance requires understanding the specific type of hinges installed on your doors. Different hinge styles demand unique adjustment approaches and repair techniques. Most modern cabinets use either European-style concealed hinges or traditional butt hinges, each offering distinct advantages for DIY repairs.

Adjusting European-Style Concealed Hinges
European-style concealed hinges provide multiple adjustment points for precise door positioning. These hinges feature integrated screws that control height, depth, and lateral movement. Start by identifying the three main adjustment screws on each hinge.
The height adjustment screw moves the door up or down. Turn clockwise to raise the door and counterclockwise to lower it. The depth screw controls how far the door sits from the cabinet frame. The lateral screw adjusts side-to-side positioning for proper gap spacing.
Fixing Traditional Butt Hinge Problems
Traditional butt hinges require different repair approaches than concealed systems. Sagging doors often need shim installation behind the hinges to restore proper positioning. Remove the hinge screws and insert thin wooden shims to adjust the angle.
Check for stripped screw holes that prevent secure hinge attachment. Fill damaged holes with wooden dowels or toothpicks coated in wood glue. Allow the repair to dry completely before reinstalling the hinges.
Correcting Door Warping and Alignment Issues
Door warping results from moisture exposure and temperature changes that cause wood expansion. Minor warping can be corrected by adjusting hinge positions or adding support brackets. Severe warping may require professional assessment or door replacement.
Measure gaps around the door perimeter to identify alignment problems. Consistent gaps indicate proper alignment, while uneven spacing reveals adjustment needs. Make small incremental changes and test door operation after each adjustment.
Fixing Sticky and Hard-to-Close Cabinet Doors
Cabinet doors that stick or are hard to close need fixing. These problems often come from not enough lubrication, misaligned parts, or wood affected by the environment. Knowing the cause helps find the best way to fix them.
Most sticky door problems can be fixed with the right solution. Knowing why they happen helps avoid them again and keeps your cabinets working longer.
Lubricating Hinges and Moving Parts
Keeping cabinet doors moving smoothly is key. Use a few drops of 3-in-1 oil or white lithium grease on hinge pins and pivot points. Stay away from petroleum-based products that draw in dust and dirt.
After adding lubricant, move the doors back and forth a few times. This spreads the oil across all moving parts. Good lubricants cut down on friction and stop parts from wearing out too soon.
Adjusting Door Catches and Magnetic Latches
When catches are off, doors don't close right. Loosen the screws holding them and adjust their position. Make sure they line up with the door hardware. Check how hard it is to close the door and tweak the spring if it's too hard.
Magnetic latches can weaken over time. If they're not strong enough, replace the magnets or adjust the strike plate. Getting them to line up right makes doors close smoothly without too much effort.
"The key to successful furniture repair lies in addressing the underlying cause, not just the symptoms."
Addressing Wood Swelling and Humidity Issues
High humidity makes wood expand, causing doors to stick. Use a dehumidifier to keep the humidity between 30-50% in kitchens. This stops wood from swelling too much.
If doors stick, sand lightly where they touch the frame. Focus on the spots where they bind, not on taking off too much wood. Apply wood conditioner or sealant to keep moisture out and keep your cabinets looking good.
Comprehensive Drawer Repair Solutions
Kitchen drawer problems can make cooking a hassle. Fixing them is key to a smooth kitchen. Knowing how drawers work helps solve issues and prevent new ones.
Diagnosing Stuck and Binding Drawers
Fixing drawers starts with finding the problem. Debris, swelling wood, and misaligned parts are common issues.
Start by taking out the drawer and checking its parts. Look for damage, wear, or blockages. Test the slides to find mechanical problems.
- Check for loose screws in mounting brackets
- Inspect drawer sides for warping or damage
- Examine track alignment and levelness
- Look for accumulated grease or debris
Replacing Worn Drawer Slides and Runners
Old drawer slides cause problems that get worse over time. New slides are better and last longer.
Measure your slides before buying new ones. Think about getting soft-close slides for better function and less wear.
Repairing Drawer Fronts and Handle Attachments
Fixing drawer fronts fixes looks and function. Loose handles are a safety risk and a sign of deeper problems.
Use the right screws to tighten handles. Replace damaged holes with plugs or inserts for stability.
Wooden Slide Maintenance and Repair
Wooden slides need special care to keep them looking good. Clean them well and use wood-friendly lubricants.
Sand rough spots and apply wax for better sliding. Replace broken wood with matching pieces when you can.
Metal Slide Installation Process
Installing metal slides needs careful measurement and mounting. Use a level and tape for accurate marks.
Mount the slides with the right screws and test them. Proper installation means smooth drawers and longer life.
Cabinet Door and Drawer Face Restoration
Cabinet face restoration makes old surfaces look new and durable. It boosts your kitchen's look. This process fixes many types of damage and keeps materials safe from more harm. It uses various repair methods for top-notch results.
First, check how bad the damage is. Each problem needs a special fix and material. Knowing the cabinet's original finish helps pick the best way to restore it.
Fixing Surface Scratches and Dents
Scratches can be light or deep. Light ones can be fixed with polishing compounds and soft cloths. This makes them less noticeable and shiny.
For deeper scratches, use wood filler or putty that matches the cabinet. Put it on a bit high, then sand it down when dry. This works on painted or stained surfaces.
Small dents can be fixed with steam and a hot iron. Cover the dent with a damp cloth and heat it a bit. The wood swells, often fixing the dent.
Repairing Peeling Veneer and Laminate
Fixing peeling veneer means removing loose parts carefully. Use a sharp knife to cut off damaged edges. Then, clean the area well before adding new adhesive.
For laminate, use contact cement. For veneer, wood glue is better. Spread the glue evenly and wait for it to get tacky before placing new pieces. Use a veneer roller to get rid of air bubbles and ensure a strong bond.
Touch-up Painting and Staining Techniques
Good touch-ups need clean surfaces and the right materials. Clean the area with degreaser and sand lightly. Prime bare wood before finishing.
Color Matching Methods
Matching colors means testing in different lights. Natural and artificial light change how colors look. Mix small amounts and test on hidden spots first.
Professional Finishing Tips
Apply thin, even coats with quality brushes or foam. Let each coat dry fully before sanding lightly with fine-grit paper. This, along with adjusting doors and replacing hinges, keeps your cabinets looking and working great.
Handle and Knob Replacement Guide
Replacing cabinet handles and knobs is a budget-friendly way to update your kitchen. It makes your space look new and works better. Today's cabinet hardware is more comfortable and lasts longer than old parts.
Getting it right means removing old parts carefully and installing new ones correctly. Each step needs focus for top-notch results.

Removing Old Cabinet Hardware
Begin by taking out screws from inside the cabinet with the right screwdrivers. Hold the hardware tight while you loosen the screws to avoid dropping it. Some cabinet hardware might have rusty screws, so use penetrating oil.
After removing, clean the mounting area well. This stops dirt from messing up the new hardware's fit.
Installing New Pulls and Knobs
Measure the old holes before buying new hardware. Use a template to keep the look and fit the same on all cabinets. This makes your kitchen look neat and organized.
Choose the right screw length for your door's thickness. Think about adding soft-close mechanisms if you're putting in new drawer slides too.
Filling and Refinishing Unused Holes
Use wood filler or dowel plugs to cover holes you don't need. Sand it smooth when it's dry and stain or paint it to match. This makes the repairs invisible when you change your hardware.
| Hardware Type | Installation Time | Difficulty Level | Tools Required |
|---|---|---|---|
| Cabinet Knobs | 2-3 minutes | Easy | Screwdriver |
| Cabinet Pulls | 5-7 minutes | Moderate | Drill, Template |
| Drawer Slides | 15-20 minutes | Advanced | Level, Measuring Tape |
| Soft-Close Hinges | 10-15 minutes | Moderate | Screwdriver, Adjustment Tool |
Getting a pro to do the job ensures it's done right and lasts. It also avoids mistakes that can mess up how things work.
Cabinet Frame and Structure Repairs
Damaged cabinet structures need careful repair. This involves wood repair skills and knowledge of cabinet maintenance. These problems can make your kitchen unstable and need fixing fast.
Structural issues often start from daily use, moisture, and settling. Spotting these problems early helps fix them without replacing the whole cabinet.
Reinforcing Loose Corner Joints
Corner joints are key to a cabinet's stability. When they loosen, the whole cabinet frame becomes unstable. Doors may not fit right anymore.
First, take out the cabinet doors and drawers to get to the joints. Use a chisel or sandpaper to remove old glue, making sure the area is clean. Then, apply wood glue to the joints and clamp them for 24 hours.
You might need to add corner brackets or wooden blocks inside the joints. These help strengthen cabinets that get a lot of use.
Fixing Cracked or Split Cabinet Wood
Wood cracks can come from stress, humidity changes, or impact. Small cracks can grow fast if not fixed, weakening the structure.
Clean the crack well, removing any loose wood. Use wood glue to fill the crack, then clamp it until it's dry. Sand it smooth after it's dry for a good finish.
Addressing Water Damage and Rot
Water damage is a big problem that needs quick action. Check how bad the damage is before starting any wood repair to see if you need to replace parts.
Wood Filler Application Techniques
Choose a wood filler that matches your cabinet's wood and color. Apply it in thin layers, letting each dry before adding more. Sand between layers for a smooth finish.
Structural Reinforcement Methods
Use metal brackets behind damaged areas for extra support. Replace badly damaged parts with wood that matches, making sure the grain is right. Keeping up with cabinet maintenance can stop most problems before they get big.
Shelf Adjustment and Replacement Solutions
Adjustable shelving turns cabinet interiors into personalized storage spots. Modern cabinets use flexible shelves for all kinds of items. These DIY repairs boost both function and order, and make cabinets last longer.
Keeping shelves in check avoids expensive fixes and keeps storage space full. The shelf's strength depends on how it's supported, its material, and how evenly it's loaded.
Installing and Adjusting Shelf Pin Systems
Shelf pin systems let you change shelf heights easily. You need to drill holes and use support pins. Use a template to drill holes that are 5mm in diameter and 32mm apart.
To adjust, move the pins to fit different item sizes. Take out items first to avoid accidents. Always check if the shelf is stable after adjusting.
Replacing Damaged or Sagging Shelves
Sagging shelves mean your storage space is shrinking. They might be weak from too much weight or moisture. Measure the old shelf's size carefully to find the right replacement.
Choose materials that match your cabinet's look and feel. Melamine-coated particleboard is durable and easy to clean. Solid wood is stronger for heavy items. Sand and finish the new shelves to blend with your cabinet.
Adding Custom Storage Solutions
Custom storage makes your cabinet more useful with special organizers and dividers. Pull-out drawers, lazy Susans, and vertical dividers turn tricky spots into useful storage.
Professional cabinet restoration often includes these upgrades to update old cabinets. Think about the weight and ease of access when adding custom solutions. This ensures they work well for a long time and are easy to use.
Preventive Maintenance for Long-lasting Cabinets
Regular care of your cabinets can save you money and extend their life. Catching problems early can prevent costly repairs. This way, you keep your cabinets in top shape without breaking the bank.
Daily and Weekly Cleaning Routines
Just a few minutes each day can make a big difference. Use a damp cloth to wipe down surfaces and remove grease. Also, check if doors are aligned properly and if they make unusual sounds.
For a deeper clean, focus on details weekly. Use cleaners made for your cabinet's finish. If hinges squeak, add a bit of oil. Never use harsh chemicals that can harm wood or finishes.
Seasonal Maintenance and Inspection Checks
Seasonal checks help catch wear and tear early. Inspect hinges, drawer slides, and catches for smooth operation. Look for loose screws, cracks, or water damage, like around the sink.
Spring and fall are great times for detailed maintenance. Tighten loose parts and adjust doors. Replace old drawer slides to avoid damage to the cabinet box.
| Maintenance Task | Frequency | Time Required | Tools Needed |
|---|---|---|---|
| Surface cleaning | Daily | 2-3 minutes | Microfiber cloth |
| Hardware lubrication | Weekly | 5-10 minutes | Light oil, cloth |
| Complete inspection | Seasonal | 30-45 minutes | Screwdriver, flashlight |
| Professional service | As needed | 1-2 hours | None required |
Recognizing When to Call Professional Help
Some issues need a pro's touch. Call experts for structural damage, water damage, or complex hardware failures. They can avoid making things worse with DIY fixes.
For big changes or safety concerns, trust the pros. They have the right tools and know-how for tough repairs. Quality professional work is often cheaper than fixing DIY mistakes.
Mastering Kitchen Cabinet Repairs for Long-Term Success
Learning cabinet repair skills makes you a confident problem-solver. This guide teaches you how to fix common issues and keep your kitchen looking great. You'll learn how to assess problems and choose the right tools.
Regular upkeep saves you from expensive repairs. Clean your cabinets weekly and check them seasonally. These steps help your cabinets last longer and work better.
Knowing how to fix cabinets saves money on your kitchen renovation. Fixing the real problem, not just the surface, gives you professional results. You can fix hinges, replace drawer slides, and restore surfaces yourself.
Don't try to fix everything yourself. If you see serious damage, water rot, or need to change electrical parts, call a pro. Safety is more important than saving money.
Every successful repair you do makes you more confident. With the right care, your cabinets will last for years. This means your kitchen will stay beautiful for your family.
Begin with simple repairs and move on to harder ones. Keep your tools in order and have spare parts ready. This way, you can fix problems fast before they get worse.
FAQ
How do I know if my kitchen cabinets need repair or complete replacement?
Check the damage, age, and material of your cabinets. For small problems like scratched surfaces or loose hardware, fixing them is usually cheaper. But, if there's a lot of water damage or the damage is widespread, it might be better to replace them.
Older cabinets made of solid wood might be worth fixing. But, if your cabinets are made of particle board and are badly damaged, it might be time to get new ones.
What tools do I need for basic kitchen cabinet repairs?
You'll need basic tools like screwdrivers, an adjustable wrench, and a measuring tape. Also, a level, drill, wood glue, sandpaper, and safety gear like glasses and gloves are important. For specific jobs, you might need special tools like hinge jigs or touch-up markers.
Having a well-lit area and a stable work surface is key for good repairs.
How can I fix cabinet doors that won't stay closed properly?
First, check if the hinges need some oil. If they do, use the right lubricant. Adjust the door catches or magnetic latches to fix the problem.
If the doors are warped, you might need to control the moisture in your kitchen. Lightly sanding the contact points can also help.
European-style hinges have adjustments that can fine-tune the door's alignment and closure.
What's the best way to repair stripped screw holes in cabinet hinges?
For small stripping, fill the hole with toothpicks or matchsticks and glue, then screw it back in. For bigger holes, use dowels and glue, letting it dry before drilling new holes.
Special hole repair compounds can also work well. Make sure the repair material is fully set before putting the hardware back on.
How do I fix drawers that stick or won't slide smoothly?
Start by cleaning out the drawer slides and runners. Then, apply the right lubricant. For wooden slides, use paste wax or soap. For metal, use silicone spray or white lithium grease.
Check if the slides are aligned right and adjust the screws if needed. If the slides are too worn out, replacing them with ball-bearing slides can improve their performance.
Can I repair peeling veneer or laminate on cabinet doors myself?
Yes, you can fix small peeling by removing the loose parts, cleaning, and reattaching with contact cement or wood glue. For bigger areas, you might need to replace the veneer or laminate.
Make sure to prepare the surface well and use the right adhesives for lasting results. If it's a complex repair, you might need a professional.
How do I match paint or stain when doing touch-up repairs on cabinets?
Take a sample of your cabinet finish to a paint store for color matching. Or, test stain colors on a hidden area first. Consider how lighting and aging might have changed the color.
For the best results, clean the whole door and apply touch-ups in thin, even coats. Let each coat dry completely before adding more. Professional color matching can give better results for complex finishes.
When should I call a professional instead of attempting DIY cabinet repairs?
Call a professional for major structural damage, water damage with mold, or electrical work. Also, seek help if you're not sure about the repair, if DIY attempts made things worse, or if you need to keep the warranty.
How often should I perform maintenance on my kitchen cabinets?
Clean your cabinets daily to remove moisture and debris. Lubricate hinges and slides weekly. Do a thorough check of all hardware and structure every 3-6 months.
Fixing small problems right away can prevent bigger issues. Regular maintenance keeps your cabinets in good shape and working well.
What's the most common cause of cabinet door sagging?
Door sagging often comes from loose hinge screws or stripped holes. Sometimes, hinges aren't strong enough for the door's weight. Heavy doors or those with glass inserts need heavy-duty hinges.
Regularly tighten the hinge screws and use the right fasteners for your cabinet material to avoid sagging.
Share:
How to Fasten Cabinets Together - Expert Installation Tips
How to Hang a Wall Cabinet Without Studs - DIY Guide