


FSC FCOC47059 . FSC is dedicated to the promotion of responsible forest management
worldwide. By selecting this product, you help take care of the woorld's forests

UL-certified for indoor drying environments not directly exposed to excessive moisture or water;
Use in the United States and Canada.

Certified to Dry ETL electrical standard: suitable for use indoors in dry locations not directly exposed to excessive moisture and water
Use in the United States

CE-certified drying equipment compliant with electrical standards: Suitable for indoor drying environments not directly exposed to excessive moisture or water;
Tested for use in Europe, the UK, and other regions.


The support center has answers to questions you may have. You can also contact customer service in the support center if you can't find what you're looking for.
Support Center >
At houlte, we are committed to delivering quality, style, and great value to our customers. Our goal is to simplify your shopping experience by providing competitive prices and exceptional service.

If an item you purchased from houlte goes on sale on our website within 30 days of your purchase date, you may request a price match. This policy ensures you always receive the best value when shopping with us.
Houlte reserves the right to interpret and adjust the terms of the Price Match Policy as necessary.
Houlte has partnered with Taskrabbit to make your everyday life at home easier by connecting you with flexible and affordable ways to get your to-do’s done including furniture assembly and mounting.

1. Purchase your furniture at Houlte.
2. Check your order Dispatched and Delivered email and click the
Houlte link. You will be redirected to Taskrabbit's landing page.
3. Post your task on Taskrabbit platform.
4. Pick the best tasker to assemble your furniture.
Houlte has partnered with Taskrabbit to make your everyday life at home easier by connecting you with flexible and affordable ways to get your to-do’s done including furniture assembly and mounting.
Taskrabbit Assembly is available in most metro areas in the US. The availability of Taskers varies based on demand. When placing an order on Taskrabbit, you will need to enter your zip code. If the service is not supported in your area, you will not be able to place an order.
You can book assembly for your Houlte furniture as early as the next day after your delivery, and up to 14 days in advance, giving you flexibility to choose a time that works best for you.

Ready to use out of the box; minimal installation may be required (e.g., handles).

Main structure is pre-built; minor components require attachment (e.g., legs).

Assembly required; multiple parts must be assembled before use.
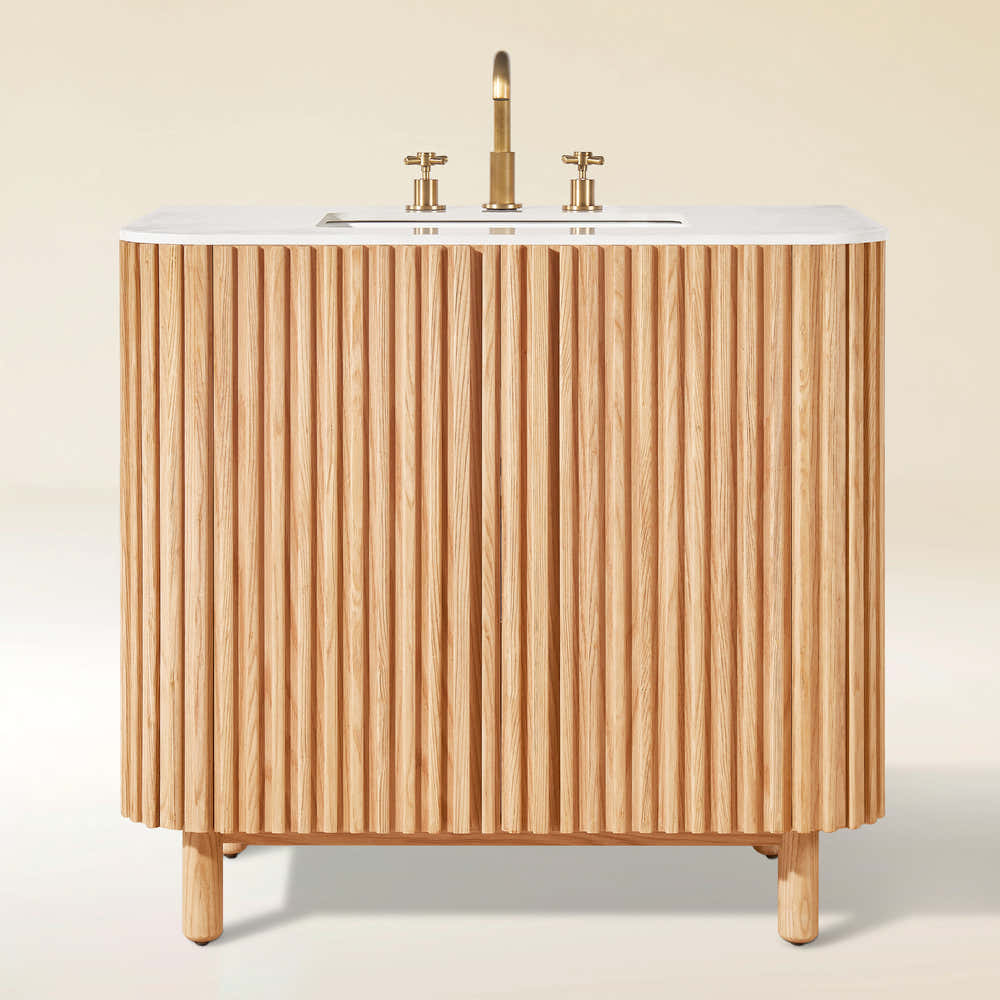
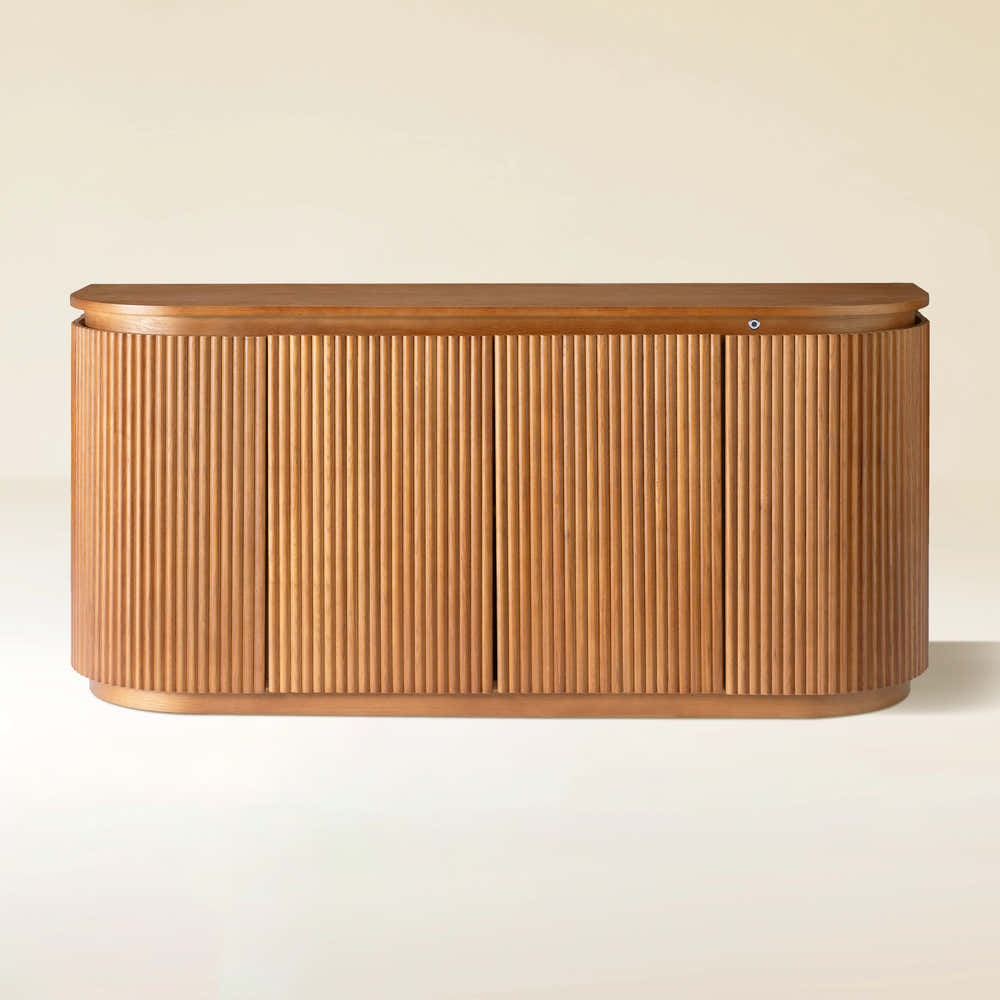
Our furniture is built with a combination of core boards, real wood veneers, and selected solid wood parts. Each material is used for a different purpose—structure, surface appearance, or visible strength—so the final piece feels balanced in performance, finish, and cost.
Core boards form the internal foundation of the furniture. They provide structure, stability, and efficiency across large surfaces and cabinet bodies.

Stable structural board

Smooth and consistent

Functional internal board
Selected solid wood parts are used where visible strength, tactile quality, and structural integrity matter most—such as legs, frames, trim, and exposed support details.

Durable and classic

Light and versatile

Premium and elevated
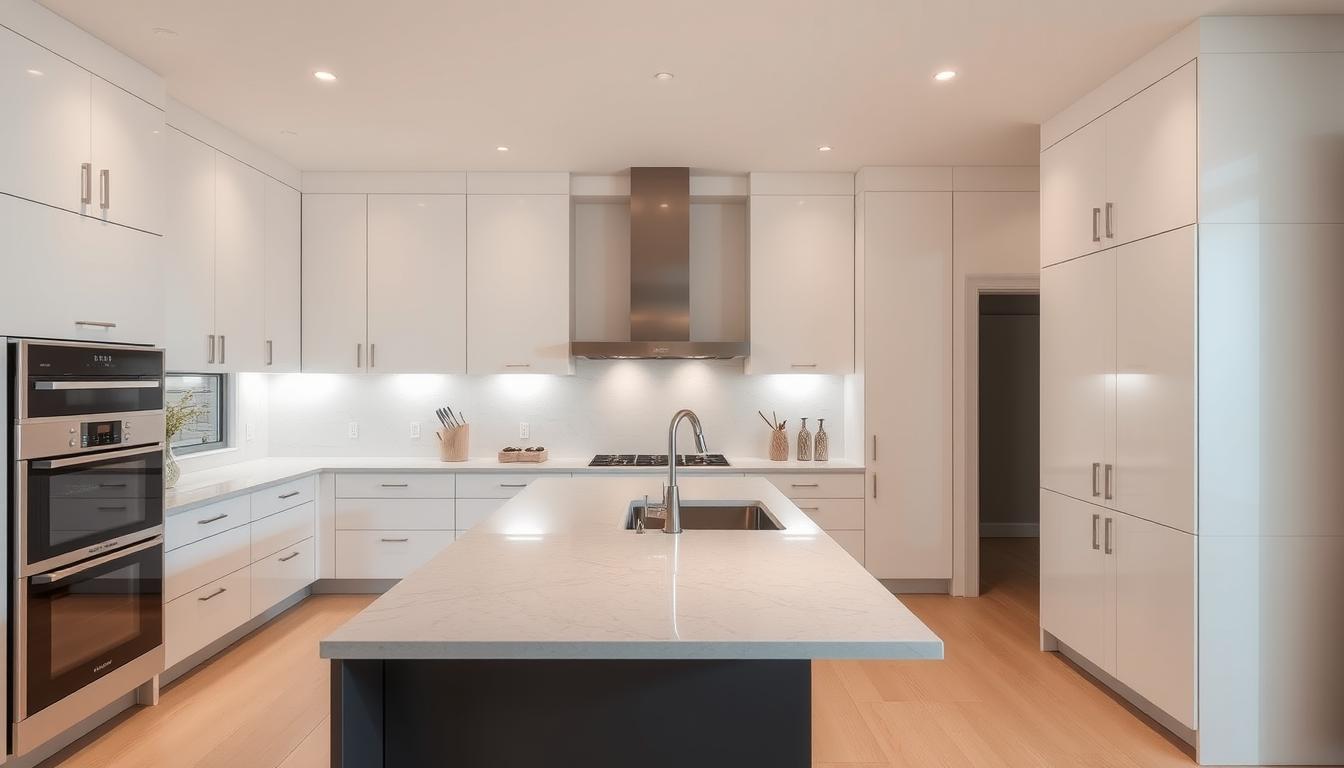
Kitchen makeovers often focus on countertops and appliances. But, one key upgrade can make a big difference. The space above your upper storage is often ignored, but it holds great potential.
Most kitchens have unused space above the upper storage. This area collects dust and looks unfinished. Smart homeowners see this as an opportunity and make changes.

Extending your cabinets can change your kitchen's look and add storage. It gives your kitchen a custom, built-in feel. This upgrade boosts both function and value.
This guide covers every step of extending your cabinets. You'll learn how to measure, plan, and finish the job. It's designed for all skill levels and budgets. Whether you're a DIY enthusiast or a pro contractor, you'll get great results.
Every cabinet extension project needs careful planning before starting. This step is key to a smooth kitchen renovation or avoiding costly problems. It helps prevent structural issues and makes sure the extension fits well with your current cabinets.
Start by looking at your kitchen's structure and what holds it up. Check for wires, pipes, and ducts in the ceiling. Also, note the state of your cabinets and how they're mounted.
Find out if there are any structural limits that could impact your plans. Look for uneven walls, ceiling issues, or beams that need special care.
Getting accurate measurements is crucial for a successful extension. Measure the ceiling height at different spots, as old homes can vary. Also, record the size of your current cabinets, including their width, depth, and height.
Take note of the space between your cabinets and the ceiling. Measure the space for doors and drawers to ensure they work right after the extension. These measurements help choose the right materials and how to install them.
Set a budget that includes materials, tools, and professional help. Consider costs for wood, hardware, paint, and finishing touches. Add 15-20% for unexpected costs during your kitchen renovation.
Make a detailed schedule for when materials arrive, when you'll install them, and drying times. Most projects take 3-5 days, depending on how complex they are and the methods used.
To get professional results with ceiling height cabinet extensions, start by gathering the right tools and materials. The right tools help with accurate measurements, clean cuts, and secure installations. They also make the project safer and more efficient.
Measuring tools are key for a successful cabinet extension project. You'll need a quality tape measure, combination square, and 4-foot level for accurate work. A stud finder is also important to find wall framing members.
For detailed work, you'll need a hammer, screwdrivers, and chisels. A pencil and marking knife help draw precise lines. Safety glasses and work gloves are crucial for protecting yourself during installation.
Power tools make material preparation and installation faster. A circular saw is great for cutting lumber and plywood. A jigsaw is better for curved cuts and tight spaces.
A drill driver with various bits is essential for screw installation and pilot holes. An orbital sander smooths out rough edges and prepares surfaces for finishing. Consider renting a miter saw for precise angle cuts.
The materials you choose depend on your extension method and cabinet style. You can use matching wood species, plywood, or MDF for custom work. Pre-finished filler strips are a quick fix for small gaps.
For hardware, you'll need wood screws, cabinet screws, and wall anchors that can handle the extra weight. L-brackets and mounting cleats add extra support. Crown molding and trim pieces complete the look, blending well with your existing cabinetry.
Getting ready for cabinet installation is key to success. Working high up poses special risks that need careful planning. A tidy workspace keeps both the installer and the kitchen safe from harm.
Choosing the right ladder is crucial for safe access to high areas. Use professional-grade ladders with wide bases for better stability. Make sure the ladder is at least three feet above your work area.
Place ladders on solid, level ground, away from cabinets. Never put ladders on boxes or unstable things. Always keep three points of contact when climbing and don't reach too far.
For big projects, consider using scaffolding. It gives more space to work and saves time moving ladders. Always check the ladder's joints, locks, and feet before climbing.
Use heavy-duty plastic sheeting or cardboard to cover countertops. This prevents scratches and keeps the area clean. Remove or cover small appliances and breakable items from the area.
Use drop cloths or rosin paper to protect floors, and cover appliances with plastic. This keeps dust away and allows for air to circulate.
Find out where electrical circuits and switches are before starting. Turn off power and use battery tools when you can. Mark electrical boxes with bright tape for easy spotting.
Look for plumbing lines in walls or ceilings. Check for water, drain vents, and gas lines that might get in the way. If unsure, call the utility company for help.
The difference between a perfect cabinet extension and a costly mistake is in the measuring. Every DIY kitchen upgrade needs careful planning. This planning must consider the structure and any installation challenges.
Professional contractors know that rushing measurements can lead to waste and delays. They take their time to get it right.
Good planning means taking measurements more than once. This checks for any mistakes before cutting materials. It saves time and money during the installation.
Measure twice, cut once – this old carpenter's wisdom is key when working with expensive materials and tight spaces.
Ceiling height changes are a big challenge in cabinet projects. Most homes have height differences of up to half an inch on a single wall. Use a laser level to spot these changes and mark every two feet along the wall.
Check if walls are straight with a four-foot level held vertically. If they're not, you'll need shims during installation. Keep these measurements on graph paper for your DIY kitchen upgrade project.

Measure from different points to ensure accuracy. Measure the front and back of existing cabinets. This shows any wall irregularities that affect the extension's alignment.
The gap between cabinets and ceiling determines how much material you need. Subtract the cabinet height from the ceiling height, then add for crown molding. Remember to add a quarter inch for adjustments during installation.
Figure out how much material you need based on the cabinet's length. Add 10-15% for cutting errors and future repairs. This prevents running out of materials mid-project.
Don't forget to leave space around electrical fixtures and plumbing lines. This ensures safe installation and future maintenance access for your DIY kitchen upgrade.
Professional installation drawings are your project guide. Sketch each wall elevation with cabinet positions, measurements, and material specs. Include fastener locations and electrical considerations.
Make cutting lists with exact dimensions for each piece. Number each part to match your drawings. This makes the construction process smoother and reduces errors.
Plan for common problems like uneven ceilings or hidden obstacles. These detailed drawings help you prepare for challenges before starting your DIY kitchen upgrade project.
There are three main ways to extend cabinets to the ceiling. Each method is suited for different skill levels and budgets. They turn unused vertical space into useful upper cabinet storage while keeping your kitchen looking good. Knowing about each method helps you pick the right one for your needs and skills.
Choosing a method depends on several things. Your current cabinet style, budget, and woodworking skills are key. Each method has its own benefits and challenges to think about.
This method is easy on the wallet. It uses pre-made materials to cover gaps between cabinets and the ceiling. Filler strips make the look smooth without adding storage. It focuses on looks over function.
Crown molding adds beauty and hides joints. It's a simple project that most can do in a weekend. You'll need basic tools and carpentry skills.
This method works best for small gaps under 12 inches. Larger gaps might need extra support or a different approach.
This method adds real upper cabinet storage. You need to find cabinets that match your current ones. It's about getting the look right and mounting it correctly.
It's important to check if the walls can hold the extra weight. You might also need to add lights.
This method is a good mix of function and complexity. It adds a lot of storage, making your kitchen more organized.
Building custom extensions gives you total design freedom. It's for those with advanced woodworking skills and tools. You can create unique storage that fits your needs perfectly.
It's great for odd ceiling heights and cabinet shapes. Choosing the right materials ensures a perfect match. It's the longest method but gives the best results.
This method is for the experienced DIYer or professionals. It maximizes vertical space with custom upper cabinet storage solutions.
| Method | Skill Level Required | Cost Range | Installation Time | Storage Added |
|---|---|---|---|---|
| Filler Strip & Crown Molding | Beginner to Intermediate | $50-$200 | 1-2 days | None (visual only) |
| Additional Cabinet Boxes | Intermediate | $300-$800 | 2-3 days | Moderate increase |
| Custom Built Extensions | Advanced | $200-$600 | 3-5 days | Maximum capacity |
Adding filler strips to your kitchen can make a big difference without breaking the bank. This method fills the gap between cabinets and ceiling, giving your kitchen a polished look. It's easy enough for DIY fans to tackle.
Filler strips make your kitchen look seamless. They come in many designs and materials. Most people prefer this over replacing cabinets entirely.
Choosing the right materials is key to a successful kitchen update. Wood species matching is important for a cohesive look. Popular choices include oak, maple, cherry, and birch.
Think about these factors when picking materials:
Pre-finished strips are easy to use and look consistent. Unfinished materials let you stain them to match your cabinets. Make sure to measure your strips carefully before buying.
Before you start, cut your strips to fit any ceiling bumps. Use a level to find the highest and lowest points on the ceiling. Mark these on your strips for accurate cuts.
Start by attaching support cleats to your cabinets. These will hold your filler strips in place. Use 2x2 inch lumber for strong support.
Here's how to install them:
Begin installing filler strips from one end of the cabinet. Work your way to the other end. This keeps everything aligned.
Test each strip before you attach it. Make small adjustments to avoid gaps. Use shims for uneven ceiling heights.
Use hidden fasteners to attach your strips for a clean look. Brad nails are good for strips under 3/4 inch thick.
For thicker strips, use screws in a strategic way. Countersink them slightly and fill the holes with wood putty.
Finishing touches complete your kitchen update. Sand everything to 220-grit for a smooth finish. Then, prime and paint or stain your strips.
Edge banding hides plywood edges. Iron-on veneer gives a professional finish. Trim excess material with a sharp knife for clean edges.
Adding crown molding makes your kitchen look even better. Choose molding that fits your kitchen's style.
Adding upper cabinet boxes above your current cabinets boosts storage and makes your kitchen look complete. This method adds real storage, not just fancy fillers. It's important to plan well to keep your kitchen looking good and working right.
Matching your cabinets and securing them to studs is key. A pro can make sure everything fits and lasts a long time.
Looking for matching cabinets means checking your current ones' details. Many suppliers have a wide range of styles and finishes. Start with your original cabinet maker, as they might still have what you need.
If your maker is out of stock, custom shops can make exact matches. This costs more but looks perfect. Take your doors and hardware to get it just right.
Think about getting slightly bigger cabinets that can be trimmed down. Heights like 12, 15, 18, and 24 inches give you options for your ceiling.
Start by finding wall studs and marking them. Use a ledger board to hold the cabinets while you install them. This keeps everything safe and in place.
Level each cabinet box with shims to fit uneven walls. Use a 4-foot level to check both sides. This makes sure doors open right and looks even.
Use the right screws for your walls, like 3-inch screws into studs. Spread out the screws to keep the cabinet stable.
Use connectors or screws to link new and old cabinets. This keeps them together and looking good. Pre-drill to avoid splitting the wood.
If your cabinets have face frames, add extensions to match. Use the same style and joinery for a seamless look. Sand and finish to blend with the rest of your kitchen.
Fill any gaps with trim or molding. This adds the final touch and completes your kitchen's look.
Building custom cabinets gives you endless options when standard ones won't fit. It ensures your new additions match your kitchen perfectly. This method requires skilled woodworking but lets you control every detail.
Start by studying your current cabinets. Match the door styles and hardware to blend seamlessly. This careful planning makes sure your new parts look like they were always there.

Kitchens often have special needs that standard cabinets can't meet. Begin by noting any odd ceiling lines or storage needs. Make detailed drawings to show how your new pieces will fit.
Think about how your new cabinets will look with the old ones. Keep the style and size consistent. Pay close attention to door details and crown molding to create a cohesive look.
Remember to design for easy maintenance and access. Include removable panels for utility access. Your design should also fit standard appliances and keep clearances safe.
Choose building methods that match your kitchen's style. Face-frame works for traditional, while frameless suits modern kitchens. Your joinery should be strong yet blend with the rest of the cabinets.
Pick materials that match your cabinets. Use the same wood and finishes for a perfect match. Quality control is key to avoid mistakes and ensure a smooth fit.
| Construction Method | Best Applications | Skill Level Required | Cost Range |
|---|---|---|---|
| Face-Frame Construction | Traditional kitchens, painted finishes | Intermediate to Advanced | $200-400 per linear foot |
| Frameless European Style | Modern kitchens, natural wood finishes | Advanced | $300-500 per linear foot |
| Hybrid Construction | Mixed cabinet styles, budget projects | Intermediate | $150-300 per linear foot |
| Custom Millwork | High-end installations, unique designs | Professional | $500-800 per linear foot |
Plan your cuts and assembly to save materials and time. Use top-notch fasteners and hardware. This ensures your extensions work well for a long time.
Installing custom extensions needs careful handling due to their size and weight. Plan the installation to avoid kitchen disruption. Use the right tools and have help for safe placement.
Mounting must be secure and even. Use the right fasteners and blocking. Your system should be stable and allow for adjustments.
Finish with precise door alignment and hardware setup. Test everything before adding crown molding and trim. Professional installers make final adjustments for smooth operation.
After finishing, check all connections and make final adjustments. Your custom extensions should blend perfectly with your kitchen, adding both storage and beauty.
Turning raw cabinet extensions into beautiful kitchen storage starts with surface prep. This step is key to making them look like they've always been there. Or to make them stand out as a stylish update.
Getting the surface right is the base for a lasting, professional look. Without careful prep, even the best paint won't look good.
Begin by sanding with different grits. Start with 120-grit to smooth out the surface. Then, use 150-grit and finish with 220-grit for the smoothest finish.
Wipe away dust with a tack cloth or microfiber rag after each sanding. Dust under the primer can cause bumps and texture problems.
Choose the right primer for your material and finish. Wood needs different primers than MDF or plywood. Oil-based primers stick well to most cabinets, while water-based dry faster.
Matching cabinet colors needs careful checking under different lights. Natural light shows the truest colors, but also check under your kitchen's lights.
Think about these when picking paint:
Choose cabinet paints that stick well and resist moisture and grease. Semi-gloss or satin finishes are best for kitchens because they're easy to clean.
Apply thin coats for a smooth, even finish. This method avoids drips and makes the paint last longer.
Use good brushes or foam rollers for smooth surfaces. Spray painting gives the smoothest finish but needs good ventilation and masking.
Let each coat dry fully before adding more. Rushing this can lead to bad adhesion and finish issues that need a full redo.
Crown molding turns simple cabinet extensions into stunning architectural features. It makes your kitchen look more polished. It also hides small flaws and construction joints.
Getting it right means planning well. This way, the molding looks like it was always there, not just added later.
Choose molding that fits your kitchen's style. Classic kitchens look great with detailed, curved profiles. Modern kitchens do well with simple, clean lines.
Think about your ceiling height when picking molding size. For 8-foot ceilings, 3 to 4-inch molding works best. Larger profiles up to 6 inches are okay for higher ceilings.
Crown molding needs special cuts for corners. Use a miter saw to get the right angles. Most crown molding uses a 45-degree miter and a 33.9-degree bevel for inside corners.
Start by marking where to place the molding. Keep the reveal the same on both sides for a uniform look. Use finish nails to secure it, making sure to pre-drill to avoid splitting.
Fill nail holes with matching wood filler. Sand it smooth when it's dry. Then, use painter's caulk to seal gaps, making everything look seamless.
Finish with touch-up painting and inspecting all joints. Good finishing work makes the difference between a pro job and a DIY attempt.
Installing cabinet extensions can be tricky, even for pros. Home improvement fans often face issues that need quick fixes. Knowing these problems helps keep your project on track.
Most problems fall into three main areas. Each needs a specific fix. Finding the cause early stops small issues from growing big.
Measurement mistakes often come from uneven ceilings and walls. These issues make fitting parts hard. Strategic shimming helps fix these problems.
Aligning parts right is key. Use adjustable brackets and shims for this. Trimming small parts helps fit everything together smoothly.
Weak walls can cause big problems. Pipes or wires might need special fasteners. Sometimes, you need to add extra support for safety.
How much weight your walls can hold matters. Spread the weight with the right fasteners. For heavy cabinets, get a structural engineer's advice.
Color mismatches and surface flaws can ruin the look. Fixing these involves sanding and adjusting colors. This makes everything look professional.
Choosing good materials and planning well can prevent many issues. This way, you avoid most problems before they start.
Keeping your extended cabinets in top shape is key to enjoying your kitchen. Regular care stops small problems from turning into big, expensive fixes. Your high cabinets need constant attention to look great and stay strong.
Check your cabinets every three months for any signs of movement. Look for gaps between the cabinets and walls. Make sure doors and drawers open smoothly.
During each check, tighten any loose screws and hardware. Focus on the mounting brackets and support points. Seasonal changes can cause wood to shift, affecting cabinet alignment.
Save leftover paint for quick fixes on scratches and scuffs. Clean the area well before painting. Apply thin coats and sand between them for a smooth finish.
For deeper damage, use wood filler. Let it dry fully before sanding and painting. Make sure to match the paint color well, as it may have changed over time.
Clean your cabinets monthly with the right wood cleaners. Stay away from harsh chemicals that can harm the finish. Keep the kitchen's humidity in check to prevent wood damage.
Get a pro to inspect your cabinets annually for complex setups. Fix any structural issues right away to keep your kitchen safe and looking good. With the right care, your cabinets will enhance your kitchen for years to come.
Extending cabinets to the ceiling makes a big difference. It adds storage and looks great. This change brings more value to your kitchen.
There are three main ways to do this, fitting different budgets and skills. Filler strips are cheap and easy. Adding cabinet boxes gives more storage. Custom builds let you design exactly what you want.
Success comes from planning well and measuring right. Using the right tools and staying safe is key. Paying attention to details makes sure everything fits together smoothly.
This effort will pay off for years. It makes your kitchen look modern and functional. It also uses space better, making your kitchen look bigger.
Keeping your cabinets in good shape is important. Regular checks and small fixes keep them looking new. This way, your kitchen stays looking great for a long time.
Whether you do it yourself or get help, it's a smart kitchen upgrade. Going from regular cabinets to tall ones adds lasting value. It makes your kitchen better to use and more attractive to everyone.
The cost varies a lot. Filler strip installations cost $200-800 for materials. Additional cabinet boxes can be $500-2,000 per foot. Custom-built extensions cost $1,500-4,000 per foot, including materials and labor.
DIY projects can save 50-70% but need a lot of time and woodworking skills.
Most kitchens can have cabinet extensions. But, you need to check a few things. The ceiling should be at least 9 feet high.
Also, make sure there's no electrical wiring, plumbing, or HVAC in the area. You'll also need to check if the walls can hold the weight of the cabinets.
You'll need a circular saw, jigsaw, drill driver, level, and measuring tape. A stud finder and safety gear like ladders or scaffolding are also important.
For filler strip methods, you'll need sanders and brushes for finishing. More complex projects might need specialized tools like pocket hole jigs.
The time needed varies. Simple filler strip installations can take 2-3 days. Additional cabinet box installations take 4-7 days.
Custom-built extensions can take 1-2 weeks. Remember to add time for material delivery and drying of finishes.
It depends on your skills and time. DIY is good for filler strip methods if you have basic woodworking skills. But, for complex work, it's best to hire professionals.
They can handle electrical work and structural modifications. Custom work usually needs professional help.
Matching finishes needs careful color analysis. Take cabinet door samples to paint stores for color matching. Remember, aging can change colors.
Test matches on hidden areas first. For wood stains, you might need to strip and refinish all surfaces for perfect uniformity.
Yes, it adds significant value. It makes your kitchen look custom and high-end. It also increases storage space.
This improvement can return 70-80% of the investment. It makes kitchens more appealing to buyers.
Filler strips with crown molding are the cheapest. They add height but no storage. Additional cabinet boxes provide storage but need to match existing styles.
Custom-built extensions offer design flexibility but are more expensive. Choose based on budget, storage needs, and skill level.
Always turn off power and use a voltage tester near electrical components. Mark wire locations carefully and plan extensions to avoid interference.
For under-cabinet lighting, you might need to reroute wiring or install new circuits. Complex electrical work should be done by licensed electricians for safety and code compliance.
Use proper ladder safety techniques, like the 4:1 rule for ladder positioning. Maintain three points of contact. Consider scaffolding for extensive work areas.
Protect kitchen surfaces with drop cloths and ensure adequate lighting. Always have a helper for material handling. Never work alone at height or with heavy materials.
Measure ceiling height at multiple points to find variations. Use scribing techniques to mark irregular ceiling lines on filler materials.
Cut to fit using jigsaws or coping saws. Strategic shimming can level cabinet installations. Flexible caulking and crown molding help conceal minor irregularities. Plan for these variations during the measuring phase.
Regular maintenance includes checking fastener tightness and inspecting joints for gaps or movement. Monitor the finish condition.
Clean extended areas regularly to prevent dust buildup. Perform touch-up painting as needed. Annual inspections help identify issues early. Proper humidity control prevents wood movement and finish deterioration.


Share:
How to Disassemble Cabinets - Step by Step Guide
How to Fasten Cabinets Together - Expert Installation Tips